1001 Basic Pants: Assembly Instructions
1. Sew all darts. Start at the outside edge and sew toward the point of the dart, trailing off the edge at the point. Do not back stitch. Sew with small stitches and tie ends to secure. A slight curve will help shape the garment.
2. Sew Fly-Front Zipper. See instructions listed separately for Fly-Front Zipper. It is much easier to sew when there are no other garment pieces attached to the front pieces.
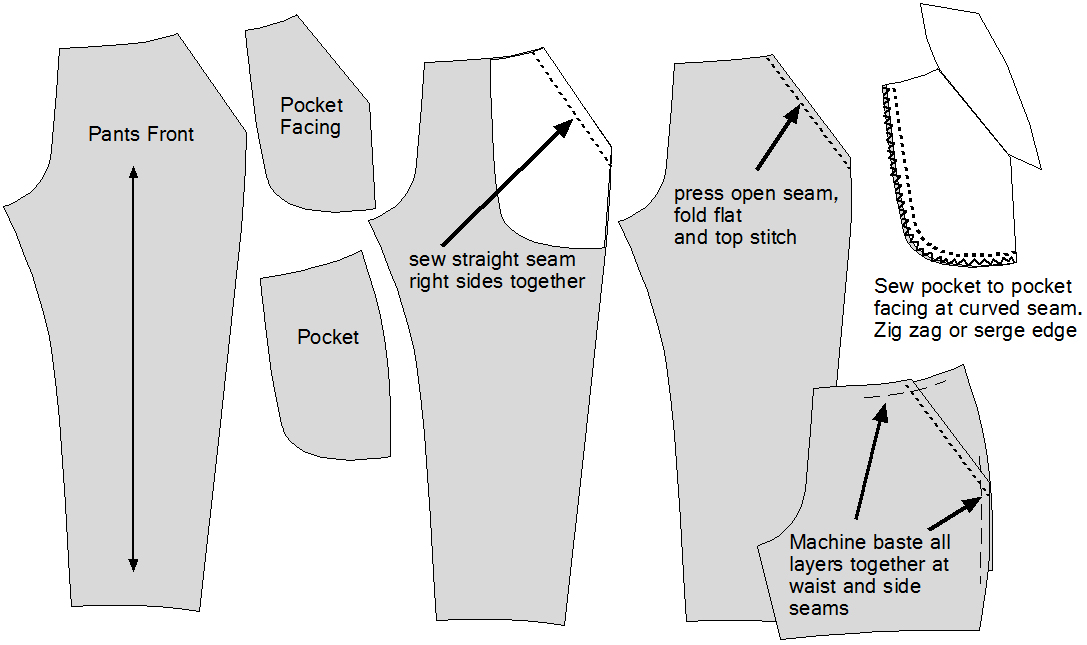
3. Attach pockets. First sew pocket facings to garment front pieces. press seam as it was sewn, then press open. Fold down and topstitch across. Then sew pockets to pocket facings. Machine baste front pieces at waist and side seams 1/2" from cut edge, holding pocket and pocket facings to front pants pieces.
4. Attach pants back pieces to the front pieces at side seams. Depending on the thickness of the fabric, it may be best to press side seam allowances toward the back of the garment rather than pressing the side seam open. Finish raw edges with zig zag or serge stitch. Top stitch along side seam if desired.
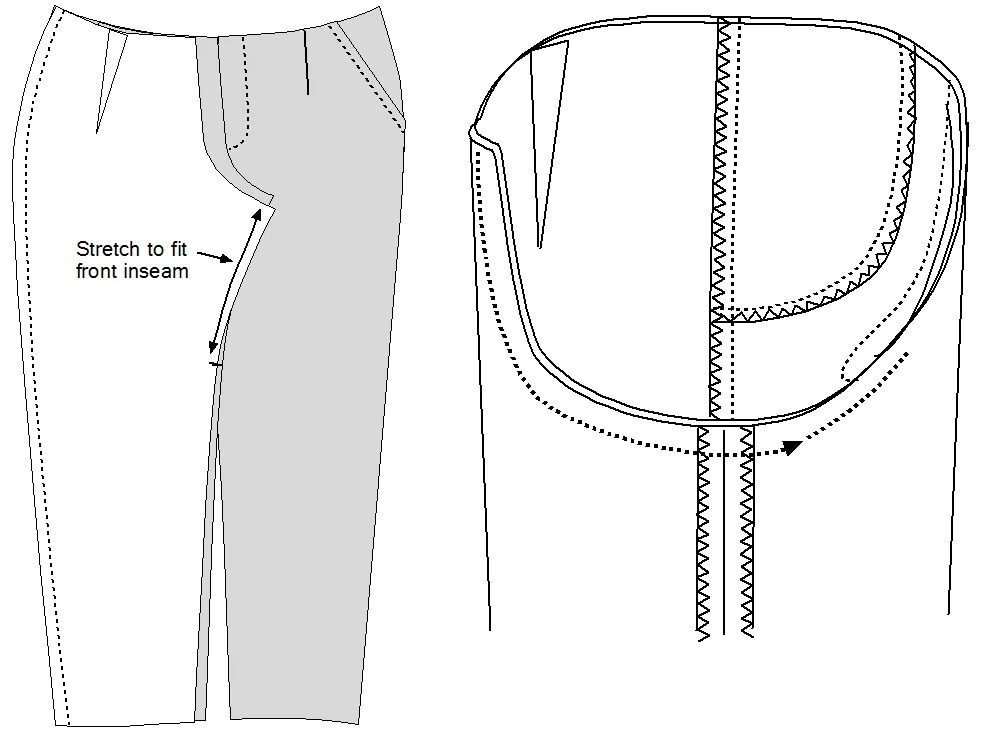
5. Attach pants back pieces to the front pieces at inseams. Stretch back piece above notch to fit front piece.
6. Press and finish all seams.
7. Turn one leg inside the other to finish sewing crotch seam. Sew crotch seam from Center Back to where sewing ended after sewing fly front zipper. Sew crotch seam twice for added strength.
8. Press crotch seam open center back to curve. Trim curved part of crotch seam to 3/8" or clip crotch seam at several places where it curves before finishing seam.
9. Try on pants before continuing in order to adjust for fit preference and fabric variation in give or stretch. When satisfied with fit, complete hems.
10. Attach waistband. See separate instructions for standard waistband.


